GIS Data Provider - Installation and Administration Guide
Introduction
The purpose of this document is to provide information how to set up GIS data service.
System Requirements
Setup has been verified with:
- Ubuntu 14.04
- OpenJDK 7
- Maven 2
- Git
Hardware Requirements
Configuration has been tested with:
- Intel i5
- 8GB RAM
Operating System Support
System configuration has been verified with Ubuntu version 14.04.
Software Requirements
Required and verified toolset to run the GIS Data Provider:
- OpenJDK 7
- Tomcat 7
Software Installation and Configuration
Required toolset
Tools for building from source code
- Tools
- OpenJDK 7
- Maven 2
- Git
- PostgreSQL
- PostGis
Tools can be installed with following command: sudo apt-get install maven2 openjdk-7-jdk git postgresql-9.3-postgis-2.1
Tools for package deploying
- Tools
- OpenJDK 7
- PostgreSQL
- PostGis
- Tomcat7
Tools can be installed with following command:
sudo apt-get install openjdk-7-jdk git postgresql-9.3-postgis-2.1 tomcat7
Optional: pgadmin3 can be used for Postgis database management: sudo apt-get install pgadmin3
Default username for PostgrSQL installation is postgres. createuser -command in terminal shell creates new user to PostgreSQL so that Linux / UNUX IDENT authentication can be used.
Setup GeoServer with W3DS and DDS community modules
FIWARE GIS Data Provider delivery provides 2 alternative ways to get GIS service running:
- getting and compiling source codes and running service with Jetty server
or
- deploying ready compiled and packaged geoserver.war e.g. to tomcat.
NOTE: only one setup method is needed.
Compile GeoServer and run it with Jetty server
For the latest version of the GeoServer it is recommended to build it from the sourcecodes found from Github.
First Java, Maven and Git needs to be installed. After this GeoServer codes can be cloned from Github.
GIS GE related changes are in fiware_rel_4.x brach and it can be
cloned with git clone -b fiware_rel_4.x from https://github.com/Cyberlightning/geoserver.git
After GeoServer project is cloned it needs to be build with Maven. In addition to default GeoServer build command -Pw3ds -Pdds switchs needs to be given. This enables build process also for W3DS module which contains XML3D support and WorldWind Format Module which contains support for image based elevation data. Build is done in src-folder in root of GeoServer file structure.
cd geoserver/src
mvn install -DdownloadSources=true -Pw3ds -Pdds
Above command executes also automated tests. If Automated tests wants to be skipped, it can be done by using -DskipTests=true -switch.
mvn install -DdownloadSources=true -DskipTests=true -Pw3ds -Pdds
Build generates geoserver.war package to "Geoserver_root_directory"/src/web/app/target.\ After building GeoServer succesfull build is indicated similarly as below examle shows:
[INFO]
------------------------------------------------------------------------
[INFO] Reactor Summary:
[INFO]
[INFO] GeoServer ......................................... SUCCESS [0.757s]
[INFO] Core Platform Module .............................. SUCCESS [0.465s]
[INFO] Open Web Service Module ........................... SUCCESS [0.314s]
[INFO] Main Module ....................................... SUCCESS [2.328s]
[INFO] Web Feature Service Module ........................ SUCCESS [0.295s]
[INFO] Web Coverage Service Module ....................... SUCCESS [0.103s]
[INFO] Web Map Service Module ............................ SUCCESS [0.315s]
[INFO] GeoServer Web Modules ............................. SUCCESS [0.039s]
[INFO] Core UI Module .................................... SUCCESS [0.935s]
[INFO] Security UI Module ................................ SUCCESS [0.262s]
[INFO] GeoServer Security Modules ........................ SUCCESS [0.095s]
[INFO] GeoServer JDBC Security Module .................... SUCCESS [0.235s]
[INFO] GeoServer LDAP Security Module .................... SUCCESS [0.165s]
[INFO] Web Coverage Service 1.0 Module ................... SUCCESS [0.105s]
[INFO] Web Coverage Service 1.1 Module ................... SUCCESS [0.219s]
[INFO] KML support for GeoServer ......................... SUCCESS [0.114s]
[INFO] GeoWebCache (GWC) Module .......................... SUCCESS [0.164s]
[INFO] REST Support Module ............................... SUCCESS [0.078s]
[INFO] REST Configuration Service Module ................. SUCCESS [0.158s]
[INFO] WMS UI Module ..................................... SUCCESS [0.101s]
[INFO] GWC UI Module ..................................... SUCCESS [0.142s]
[INFO] WFS UI Module ..................................... SUCCESS [0.074s]
[INFO] Demoes Module ..................................... SUCCESS [0.094s]
[INFO] WCS UI Module ..................................... SUCCESS [0.093s]
[INFO] Community Space ................................... SUCCESS [0.028s]
**[INFO] WorldWind Format Module ........................... SUCCESS [15.518s]**
**[INFO] Web 3D Service .................................... SUCCESS [0.111s]**
[INFO] GeoServer Web Application ......................... SUCCESS [1.178s]
[INFO] GeoServer Extensions .............................. SUCCESS [0.174s]
[INFO]
------------------------------------------------------------------------
[INFO] BUILD SUCCESS
[INFO]
------------------------------------------------------------------------
[INFO] Total time: 9.834s
[INFO] Finished at: Wed Jun 24 15:29:48 EEST 2015
[INFO] Final Memory: 59M/726M
[INFO]
------------------------------------------------------------------------
Make sure that Web 3D Service and WorldWind Format Module builds are successful. If building fails, verify that tools are correctly installed and git repository is successfully cloned.
Now when GeoServer is successfully build, it can be launched. GeoServer.war -package can be deployed in example to Tomcat, but since Jetty is bundled to GeoServer source code package using it is straightforward. To start GeoServer first go to "GeoServer_root_directory"/src/web/app -directory and execute following command:
cd web/app
mvn -Djetty.port=9090 jetty:run -Pw3ds -Pdds
This starts GeoServer with W3DS module and assigns port 9090. Default
port for Jetty is 8080. When terminal shows
[INFO] Started Jetty Server -text jetty server has started
Geoserver. GeoServer admin panel can be find from the URI:
localhost:9090/geoserver. Default username is admin and password
geoserver.
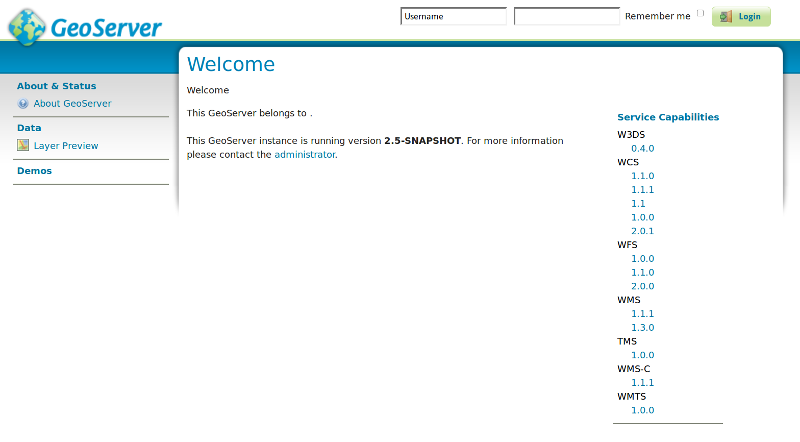
The default control panel is shown below:

Deploy provided geoserver.war
GIS Data Provider release contains generated geoserver.war packet which is snapshot version from the released GE content. war-package can be deployed in example to the Tomcat. For the latest version of the GIS Data Provider implementation it is recommended to get GeoServer source codes and build GeoServer as described in Compile GeoServer and run it with Jetty server -section.
Configuration
Setting up data assets
Setup process varies depended on what data type used asset is.
GeoTIFF based (DEM) data sets for elevation
NOTE: GeoTIFF data format for elevation data is only supported with Octet-Stream output!
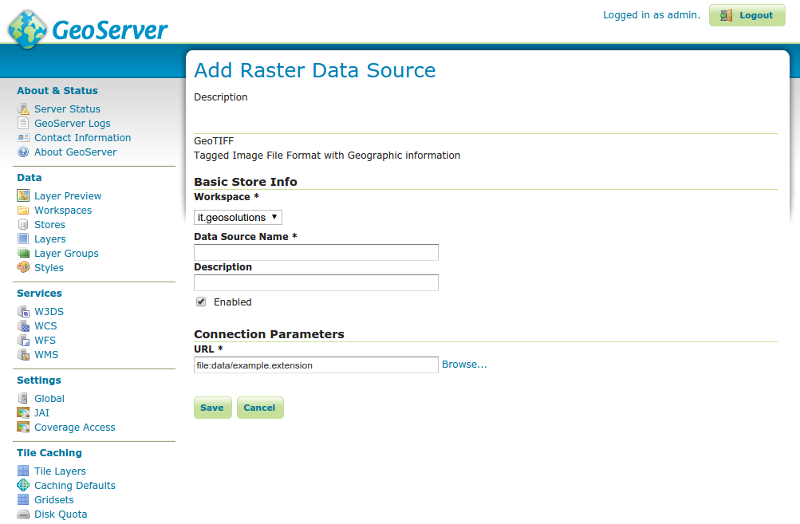
- Stores -> Add new Store -> GeoTIFF
- Set up correct workspace and name for Data Source
- When using FIWARE GIS GE reference web client used workspace needs to be named to fiware
- Browse GeoTIFF file or write URL manually
- User account running Geoserver instance (f.ex. tomcat7) must have write rights to a folder containing image.
- Save

- Publish layer
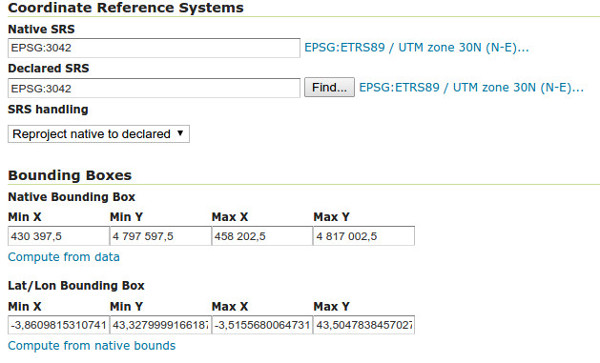
- When publishing DEM layer it is important to make sure that
source data SRS is recognized correctly. This can be verified in
the DATA-tab. Correct SRS information should be possible to
get from same place where source data was acquired.
- In case uncertain if
Native SRSis not working correctly, define correct SRS manually to theDeclared SRS-field. SetSRS handlingtoReproject native to declaredorForce declared.
- In case uncertain if
- From Publishing tab set
Byte OrdertoBig Endian
- When publishing DEM layer it is important to make sure that
source data SRS is recognized correctly. This can be verified in
the DATA-tab. Correct SRS information should be possible to
get from same place where source data was acquired.

Polygon based data sets for elevation
Follow setup guide from Unit Testing Plan Unit Testing Plan
Texture layers
Publish data sets used as a texture by following official GeoServer guides.
Memory configuration
Allocated memory usage in Jetty can be defined with
DMAVEN\_OPTS="-Xmx2048m -Xms1024m". This can be done when Jetty server
is launched. For example:
DMAVEN_OPTS="-Xmx4096m -Xms2048m" mvn -Djetty.port=9090 jetty:run -Pw3ds -Pdds
Configuration for allowing cross-origin requests
By default server doesn't allow cross-origin requests. Cross-origin
request can be allowed by adding following options to
src/web/app/pom.xml and src/web/app/src/main/webapp/WEB-INF/web.xml
Add new items as a last items under each section. In example put below \<dependency> as a last dependency definition in the pom.xml
src/web/app/pom.xml:
<dependency>
  <groupId>org.eclipse.jetty</groupId>
  <artifactId>jetty-servlets</artifactId>
  <version>9.2.4.v20141103</version>
</dependency>
src/web/app/src/main/webapp/WEB-INF/web.xml:
<filter>
  <filter-name>cross-origin</filter-name>
  <filter-class>org.eclipse.jetty.servlets.CrossOriginFilter</filter-class>
</filter>

<filter-mapping>
  <filter-name>cross-origin</filter-name>
  <url-pattern>/*</url-pattern>
</filter-mapping>
NOTE: project must be rebuild for changes to take effect.
Sanity check procedures
The Sanity Check Procedures are the steps that a System Administrator will take to verify that an installation is ready to be tested. This is therefore a preliminary set of tests to ensure that obvious or basic malfunctioning is fixed before proceeding to unit tests, integration tests and user validation.
End to End testing
If GeoServer started with suggested command, it is currently running on localhost 9090 -port. To verify that GeoServer is running type http://localhost:9090/geoserver to your web browser. Geoserver admin panel should be opened. Default username is admin and password geoserver. Login should be possible with these credentials. In the main page there is Service Capabilities-section. Press 0.4.0 under W3DS, link requests GeoServer W3DS capabilities, server responds this with XML-response. If response is successfully loaded to new page GeoServer capability requests are done correctly.
GeoServer logs can be see in http://localhost:9090/geoserver/web/?wicket:bookmarkablePage=:org.geoserver.web.admin.LogPage. Log information shows possible error situations which help to find actual problem.
GeoServer status http://localhost:9090/geoserver/web/?wicket:bookmarkablePage=:org.geoserver.web.admin.StatusPage page contains useful buttons to free memory, clear cache or reload configuration. Using these can also help solving problem situation.
List of Running Processes
Verify that Jetty is running with following command: ps aux | grep jetty
Network interfaces Up & Open
If proposed Jetty command is used, port 9090 should be free. If other free port needs to be used, assign it correctly when starting Jetty server.
Databases
It is possible to store GIS data with 3D information straight to GeoServer itself so separate database is not necessary required. However database performs significantly better than internal data storage. PostGis extension in PostgreSQL is one option to be used as a database. More information of the PostGis usage with GeoServer can be found here.
As the database selection is user definable, the sanity check for it is the same. However, if PostGIS has been installed as indicated by this guide, the easiest way to sanity check its functionality is to use pgAdmin3 tool, and login to the database with default used "postgres". Having a successful connection with matching information about the database structure visible via the tool will satisfy the sanity check requirement.
Diagnosis Procedures
Resource availability
Just after start memory consumption is about 1,5GB. During testing memory usage variation was between 3-4GB which was seen as normal behavior.
GeoServer with modified W3DS module in Git requires \~300MB hard disk space. Compiled geoserver.war package is \~60MB which can be deployed to web server.
Remote Service Access
The purpose of this GE is to serve geographical data for clients, either browser or native based. There are no dedicated links for other enablers for this purpose, however, nothing stops other enablers from using the service via the same HTTP interface as the regular clients do.
Resource consumption
Just after start memory consumption is about 1,5Gb. Normal memory usage is between 3-4Gb. This estimation is based on the GIS GE test data usage.
CPU usage is related to operations, e.g. CPU usage can vary between 0-100%.
I/O flows
I/O flow amount is highly depend of the bounding box area and what is the detail level inside bounding box. Therefore I/O flow can drastically change even though requested bounding box area is same. I/O flow type is HTTP and admin parameters can be encrypted.